The Ultimate Survivalist’s Guide to Canning Food for Safe, Long-Term Storage
To can food safely for long term storage, use a pressure canner for low-acid foods (meats, veggies) and a water bath canner for high-acid foods (fruits, pickles). Proper processing times, jar sterilization, and pH levels are critical to killing bacteria like botulism. For example, green beans canned in a water bath (instead of a pressure canner) risk deadly toxins—even if they look and smell fine.
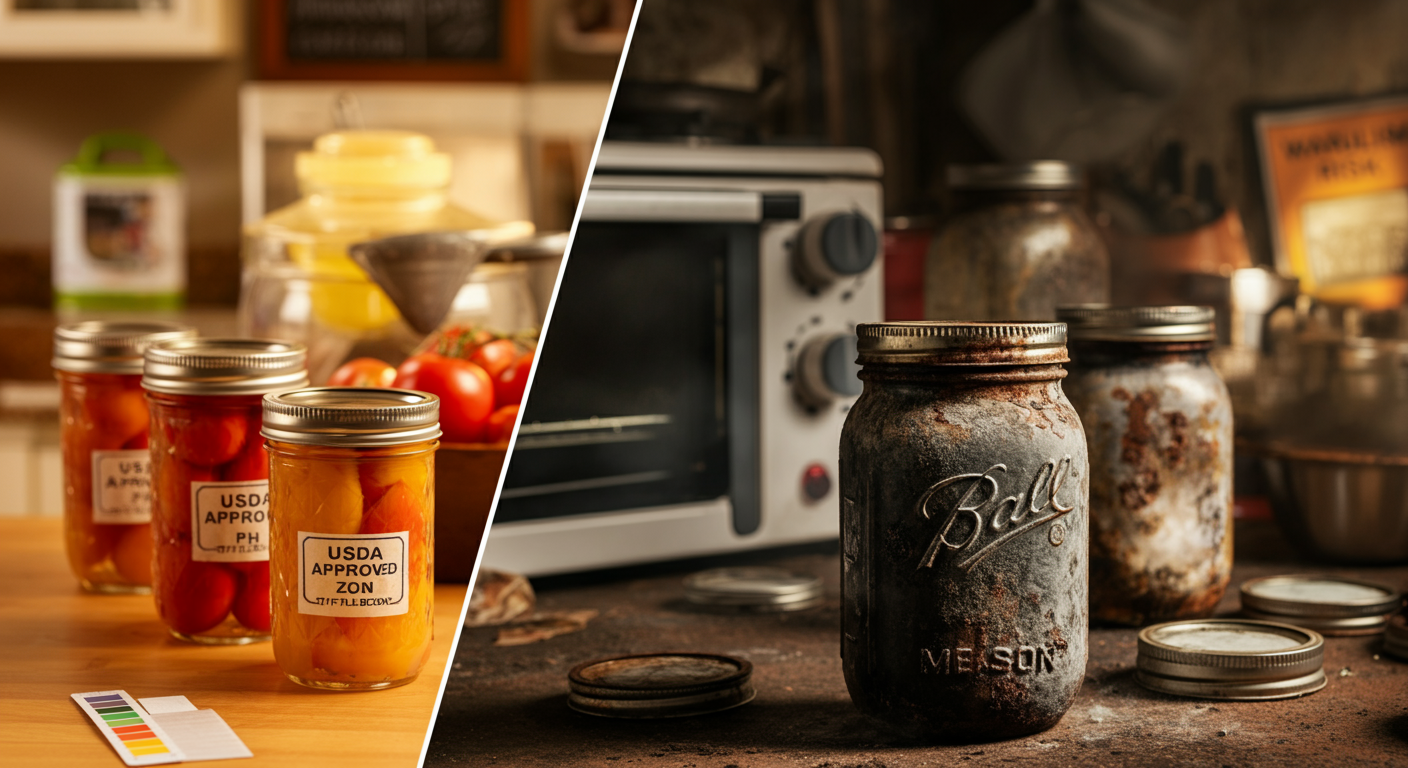
But safe canning isn’t just about equipment. Factors like altitude, jar seals, and recipe accuracy matter. A jar of tomatoes processed at sea level for 40 minutes might need 50 minutes in the mountains. Let’s unpack the rules, risks, and step-by-step process to keep your pantry safe.
Introduction
Canning preserves summer’s harvest for winter—or a crisis. During WWII, households canned 4 billion jars yearly.
Today, homesteaders and preppers rely on this skill to stockpile food. But one wrong step can turn your pantry into a biohazard. How do you avoid lethal mistakes? What tools are non-negotiable?
Short Answer: Safe canning requires sterilized jars, tested recipes, and the right canner. Pressure can low-acid foods (meats, veggies) at 240°F+ to kill botulism spores. Water bath can high-acid foods (jams, pickles) at 212°F.
What Is Canning? (And Why Botulism Kills)
Canning is a science, not an art. It uses heat and airtight seals to destroy bacteria, yeasts, and molds. But one mistake can invite Clostridium botulinum—the bacteria causing botulism, a toxin deadlier than cyanide.
Two Types of Canning
- Pressure Canning:
- For: Low-acid foods (pH >4.6) like meats, beans, corn, and most veggies.
- How: Steam under pressure reaches 240–250°F, the only temperature that destroys botulism spores.
- Example: A Presto 23-Quart pressure canner processes chicken broth at 11 PSI for 25 minutes (adjust for altitude).
- Water Bath Canning:
- For: High-acid foods (pH <4.6) like fruits, pickles, jams, and tomatoes (with added acid).
- How: Submerge jars in boiling water (212°F) to kill molds and yeasts.
- Example: Strawberry jam boils for 10 minutes in a water bath.
The Botulism Threat
Botulism spores thrive in low-acid, oxygen-free environments—like a jar of improperly canned green beans. The toxin they produce can’t be seen, smelled, or tasted.
Just 1 gram can kill a million people. Symptoms start with blurred vision and paralysis, leading to respiratory failure in 3–5 days if untreated.
Real-Life Lesson: In 1977, a Michigan family ate home-canned jalapeños. Four died. The cook used a water bath instead of a pressure canner.
5 Essential Tools for Safe Canning
1. Pressure Canner (Not a Cooker!)
A pressure canner (like Presto or All-American) reaches 15 PSI to hit 250°F. A pressure cooker (like Instant Pot) doesn’t—it’s unsafe for canning.
Pro Tip: Test your dial gauge yearly. A $5 error can mean underprocessing.
2. Mason Jars & Lids
Use Ball or Kerr jars. Never reuse lids—the sealing compound fails. Check jars for chips or cracks (they explode under pressure).
3. Canning Salt & Vinegar
- Salt: Non-iodized (iodine causes discoloration).
- Vinegar: 5% acidity for pickling. Apple cider vinegar adds flavor but stick to tested recipes.
4. pH Strips or Meter
Tomatoes vary in acidity. Test each batch—if pH >4.6, add bottled lemon juice (1 tbsp per pint).
5. USDA-Approved Recipes
Never tweak ingredients. Sugar in jam isn’t just for taste—it preserves texture. Low-sugar recipes require specific pectin.
Step-by-Step Guide to Safe Canning
Follow these steps to ensure your canned goods stay safe and shelf-stable for years.
Step 1 – Prep Your Food & Jars
Sterilize jars:
- Wash jars, lids, and bands in hot soapy water.
- Submerge jars in boiling water for 10 minutes (or run through a dishwasher).
- Trim bruises, pits, or stems.
- For meats: Remove fat and bones, cut into 1-inch cubes.
- For veggies: Blanch green beans or carrots for 2–3 minutes to preserve color.
Pro Tip: Use fresh produce. Overripe tomatoes or soft fruits can lower acidity, raising botulism risk.
Step 2 – Fill & Seal Jars
Leave headspace:
- 1/4 inch for jams, pickles, and liquids.
- 1 inch for meats, stews, or chunky veggies (they expand when heated).
Avoid air bubbles:
- Slide a plastic spatula along the jar’s sides to release trapped air.
Seal properly:
- Wipe jar rims with a vinegar-dampened cloth.
- Place lids on jars, screw bands until “finger-tight” (snug but not forced).
Example: A jar of salsa with 1/4-inch headspace and no bubbles seals better than a rushed fill.
Step 3 – Process Correctly
For pressure canning:
- Add 2–3 inches of water to the canner.
- Load jars onto the rack, seal the lid.
- Vent steam for 10 minutes, then add the weight.
- Process at 11 PSI (adjust for altitude) for the time specified in USDA guidelines.
For water bath canning:
- Fill the pot enough to cover jars by 1–2 inches.
- Boil water, lower jars in with a jar lifter.
- Start timer once water returns to a rolling boil.
Altitude Adjustments:
- Pressure canning: Add 1 PSI for every 2,000 feet above sea level.
- Water bath: Add 5–10 minutes for elevations above 1,000 feet.
Real-Life Hack: In Denver (5,280 ft), green beans need 25 minutes at 15 PSI, not 20 minutes at 11 PSI.
Step 4 – Cool & Store
Cooling:
- Turn off heat, let the pressure canner depressurize naturally (30–45 minutes).
- Remove jars with a lifter, place on a towel-lined counter.
Check seals:
- Press the lid center. If it flexes, refrigerate or reprocess.
- Remove bands to check for stuck food (rust risk).
Storage:
- Label jars with contents and date.
- Store in a cool (50–70°F), dark place. Avoid attics or garages.
Pro Tip: Canned meats last 3–5 years; pickles and jams last 1–2 years for peak flavor.
Pressure Canning vs. Water Bath: What Goes Where?
Pressure Canning Foods
- Meats: Chicken, beef, venison (raw or hot pack).
- Low-acid veggies: Green beans, corn, carrots, potatoes.
- Soups/stews: Only if recipe includes USDA-approved processing times.
Why: Botulism spores survive boiling temps but die at 240°F+ (only achievable under pressure).
Water Bath Canning Foods
- Fruits: Applesauce, peaches, berries.
- High-acid tomatoes: Add 1 tbsp bottled lemon juice per pint.
- Pickles: Cucumbers in 5% acidity vinegar brine.
- Jams: Use tested recipes with exact sugar/pectin ratios.
Why: Acid (pH <4.6) inhibits botulism, so boiling temps are sufficient.
Exception: Never water bath can pumpkin puree—its density traps heat, risking underprocessing.
5 Deadly Canning Mistakes to Avoid
1. Guessing Processing Times
Risk: Underprocessing = botulism. Overprocessing = mushy food.
Fix: Use USDA’s Complete Guide to Home Canning or Ball Blue Book.
2. Reusing Lids
Risk: Old lids fail to seal, inviting bacteria.
Fix: Buy new lids yearly. Reuse bands, but never lids.
3. Skipping Acid in Tomatoes
Risk: Modern tomatoes are less acidic. pH >4.6 = botulism playground.
Fix: Add bottled lemon juice or citric acid.
4. Ignoring Altitude
Risk: Water boils at lower temps in mountains, underprocessing food.
Fix: Adjust PSI or boil times using USDA’s altitude chart.
5. Storing Unsealed Jars
Risk: Unsealed jars grow mold within days.
Fix: Refrigerate and eat within 3 days, or reprocess within 24 hours.
Disaster Example: In 2015, 80,000 jars of green beans were recalled after a factory skipped pressure canning.
Myths About Canning Safety
Canning myths persist like stubborn weeds—charming but dangerous. Let’s rip them out by the roots.
Myth 1: “If the Lid Pops, It’s Safe.”
Truth: A popping lid means the jar sealed as it cooled. But botulism doesn’t care about seals. Clostridium botulinum thrives in low-acid, oxygen-free environments, even under a perfect lid.
Example: In 1994, a Utah family ate home-canned potatoes that “sealed perfectly.” All six got botulism. The spores survived because the cook used a water bath instead of a pressure canner.
Takeaway: Seals ≠ safety. Only proper processing kills botulism.
Myth 2: “Oven Canning Works.”
Truth: Ovens dry out jars, crack lids, and fail to reach 240°F. Botulism spores laugh at 212°F.
Disaster: A 2018 Facebook trend promoted oven-canning dried beans. Dozens reported swollen jars and illness.
Fix: Use only USDA-approved methods: pressure or water bath.
Myth 3: “You Can Taste/Smell Botulism.”
Truth: Botulism toxin is odorless, tasteless, and invisible. By the time you suspect something’s wrong, you’re already paralyzed.
Survival Tip: If a canned food looks/smells off, don’t taste it. Toss it in a sealed bag.
Real-Life Canning Disasters (And Lessons)
1977 Botulism Outbreak: Deadly Jalapeños
A Michigan family canned jalapeños in a water bath, assuming vinegar made them safe. Four died.
Why It Failed: Peppers’ pH was 5.3 (too low-acid for water bath). They needed a pressure canner.
Legacy: This case reshaped USDA guidelines, emphasizing pH testing for all veggies.
2015 Green Bean Recall: 80,000 Jars Pulled
A commercial cannery skipped pressure processing to save time. Tests found live botulism spores.
Why It Failed: Greed > safety. The factory ignored basic canning rules.
Lesson: Even pros make deadly mistakes. Trust no one—verify processing times yourself.
2020 TikTok “Canning Hack” Hospitalizes Teens
A viral video claimed you could can spaghetti sauce in a dishwasher. Teens ate it, got severe food poisoning.
Why It Failed: Dishwashers max out at 160°F—nowhere near botulism-killing temps.
Takeaway: Social media ≠ science. Stick to USDA or Ball Blue Book recipes.
How to Can Food Safely for Long Term Storage – Bottom Line
Canning is survival science. It bridges self-sufficiency and safety—but only if you respect the rules. Botulism doesn’t forgive shortcuts. Invest in a pressure canner, follow USDA guidelines, and test every batch’s pH. Your pantry isn’t just stocked; it’s shielded.
Your Next Steps:
- Buy a pressure canner (Presto 23-Quart is $100 on Amazon).
- Download USDA’s free canning guide.
- Join a local canning class (check libraries or farming co-ops).
Most times, the difference between life and death isn’t luck—it’s following instructions.
Share this guide—it might save a life. 🛑🥫
